July -August 2018: Stripping and Sealing the Body
click images to enlarge
Off with the old paint during the winter months with “Down to Metal” chemical paint remover. This is the best way to remove old paint. It does not involve rotating stripping wheels or media (sand) blasting which heat the metal panels causing warpage or “oil canning”.
 |
Distracted working on the passenger rocker, I overlook the now exposed metal roof and assumed because the car is in a garage no rust developing. Long story short, when I did inspect the roof I was astonished to see how much surface rust had developed.
Come May time to devote my attention to removing all surface rust and sealing the entire body. Just get down with it finishing up with 2-stage epoxy primer. I need to give my back a break anyway. Most of the body work is complete on the fenders and quarter panels. There is a motivational aspect to this.
Getting the outward appearance of the car to some semblance of progress and repair would be a mental boost in this lengthy project.
More Media Blasting
 |
I roll the car outside and media blast rusted areas NOT ON broad panels. This is mostly the belt trim line. I hate media blasting. So dang messy. It goes everywhere with fine dust finding its way into everything and also poses serious health hazards too if you use a silica based sand (silicosis). I do recycle my media which is ground glass. GROUND GLASS NO SAND. Of course, wear a quality dust mask, face shield and ear plugs.
Lots of Little Dings
click images to enlarge
 |
I wonder about the history of this car. Who were the previous owners? More specifically how could someone manage to bang into so many things. The metal on the 1966 BMW seems softer than modern sheet metals. There is a difference between these NK coupes and the successor e9 coupes with improvements in body reinforcement. BMW may have also evolved their sheet metal in that span of time as well. It is rumored that for a period of time European auto manufacturers were using an inferior metal import from Japan. As I remove paint, I discover previous body repairs complete with bondo filler. There are other areas of surface damage never repaired. The list is pretty long. This includes: long vertical dent where door stop failed, long horizonal gouge rear quarter, head light area impact (tennis ball inserted to stabilize headlight), minor collison rear tail light area. Then there are just numerous simple dents most likely from shopping carts and the expected parking lot door dings. Now that we are down to metal, time to fill and smooth.
Top to Bottom (Roof Down)
Roof and pillars. The next phase is to seal the mid-level areas or above the belt trim line. This includes the gasket gutters for the hood and trunk as well as the frames for the windshield and big back rear window. This is where the process slows tremendously. This car sat for years in the elements with rotted rubber. There is extensive rust pitting in these areas. Luckily the damage is not deep enough to warrant metal fabrication. I do use stripping wheels, a narrow belt sander and finally a Dremel with various heads including a cut off wheel. The cut off wheel used delicately works wonders in cutting away rust being careful not to remove metal. Finally, a conical grinding tip gets into the pitted areas. Once this is complete I follow up with PickleX.
 |
 |
click images to enlarge
Sides and Rockers
Working downward. Body repairs using 2 stage water proof body filler “Metal to Metal” which includes metal compound mixed in. Smoothing follow up with glazing putty. There are areas of pitted rust as well especially on the rear panel. This is most likely due to the car sitting with ground moisture attacking the metal. More dedicated grinding and rust conversion. sealing the metal with the epoxy primer with the goal of follow up with fillers also works.
 |
 |
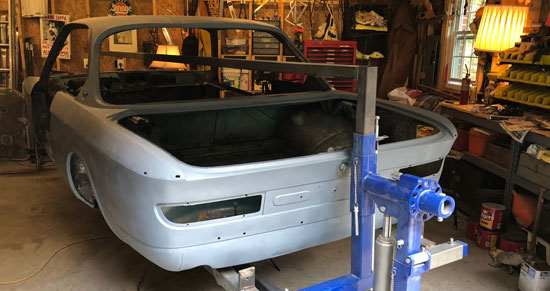
Naked car. Bare metal surfaces, now what?
2-stage Epoxy Primer
Epoxy primer is the bedrock or foundation for a paint job. It is a rugged water proof application. It must be applied to perfectly clean metal. To ensure there is no microscopic rust it is important to treat the metal with a rust neutralizer such as PickleX which is an industry standard, but make sure to sand off the residue left behind. It is also vital to thoroughly clean the bare metal with wax and grease remover.
The epoxy primer I use is high quality PPG with a catalyst. It’s a 2:1 mixture. Once you mix it, give it about 15 minutes to combine. I decided to use a paint roller versus an HVLP gun. I’ve done this before. Epoxy primer has about a 1-week window whereby you can apply sandable primer. It will be months before I apply another stage of primer, and so I will sand the first stage of epoxy primer down the road in order to give it “teeth” for adhesion. The important thing is to seal the metal now while tackling other repairs like the rotted floors.
click images to enlarge
 |
 |
 |
 |